Last Updated on 5 May 2026 by Gary Perspective Gadgets
How to Install Any App on Your Phone: A Clear, Simple Guide
As an Amazon Associate I earn from qualifying purchases. This post may contain affiliate links — if you click through and buy, I may earn a small commission at no extra cost to you.
By Gary | Perspective Gadgets | Updated: January 2026
Installing apps on your phone doesn’t need to be complicated. Whether you have an iPhone or Android device, this guide will walk you through downloading apps safely and understanding what’s free versus what costs money.
As a retired engineer, I always start with the instruction manual. When you get a new gadget—a video doorbell, smart thermostat, or health tracker—the first step is finding its companion app. This guide will walk you through installing apps on your phone, explaining everything in plain English.
Before you install any Apps is is a good idea to check if your phone a security risk, if you had it for a few years I have recently produced a Blog about how to check this.
First Things First: Finding the Instructions
Do you remember Airfix aeroplane kits, a boys toy, sorry this is a bit sexist, but this was the middle of the last Century. The first time I had one, probably a present from Father Christmas. I stuck on the clear canopy window over where the pilot sits first, then shock horror realised that I should have read the instructions before starting. I should have glued the pilot in first before the canopy, as I could not now get him/her in, my first model aeroplane was forever without a pilot !!
I own both an iPhone 14 and Samsung Galaxy A16, so I’ve tested these steps on both platforms. The instructions below cover both Apple and Android devices based on hands-on experience.
Before touching your phone, check these four places:
- The Quick Start Guide – Small paper booklet in the box
- A Sticker on the Device – Often with a QR code (square barcode), see section below for instructions.
- The Product Box – Sometimes instructions are printed on the side
- A Card with a Website – Might say “Download our app”
Engineer’s Tip: If you see a QR code, you don’t need to type anything—your phone’s camera can read it automatically.
Understanding Different App Types
Before we begin, here’s what you need to know about how apps work:
1. Free Apps (Most Common for Gadgets)
- What: No charge to download or use basic features
- Example: Ring, Fitbit, Philips Hue apps
- Payment Method Needed? Usually NO for installation
- Important: Some free apps offer “premium” features inside for extra cost (we’ll explain this)
2. Free Apps with “In-App Purchases”
- What: Free to download, but certain features cost extra
- Example: Ring doorbell app (free to answer your door, but recording history costs extra)
- How It Works: You download free → Use basic features → If you want extras, you pay inside the app
- Payment Method Needed? Only if you decide to buy the extra features
3. Paid Apps
- What: You pay to download (less common for gadget apps)
- Example: Some premium weather or photography apps
- Payment Method Needed? YES – you pay before downloading
Payment Methods: What You Really Need
The Short Answer:
For FREE apps: NO payment method needed to install
For FREE apps with optional extras: NO payment method needed to install (only if you choose to buy extras later)
The Reality:
Most phones encourage you to add a payment method, but you can skip it:
Apple’s Workaround:
- When asked for payment method, scroll to bottom
- Tap “None” (well hidden, but it’s there)
- Complete setup without payment details
Android’s Workaround:
- When asked for payment, tap “Skip”
- Or choose “Pay later” options
- You can always add payment method later if needed
Real cost examples:
Ring doorbell app: There are 4 options:
- FREE basic use to see the Live View
- Ring Solo, Video recording, smart alerts, and more, for one device. £4.99/month or £49.99/yr
- Ring Multi, Video recording, smart alerts, and more for all devices at one location. £7.99/month or £79.99/yr
- AI Pro, Artificial Intelligence used to enhance detection and better understand what the cameras are seeing. £15.99/month or £159.99/yr
Fitbit app: FREE tracking, £7.99/month for premium insights or 79.99 per year (cheaper than paying monthly, equivalent to about £6.67/month)
Philips Hue app: FREE (no subscription needed)
Most gadget apps are FREE to download and use basic features. The paid extras are optional, not required.
Engineer’s Advice: If you’re only installing free apps for gadgets, skip the payment setup entirely. You can always add it later if you decide to buy something.
iPhone (Apple) Users
What You’ll See:
- “App Store” (blue icon with white “A”)
- Your camera app (for QR codes)
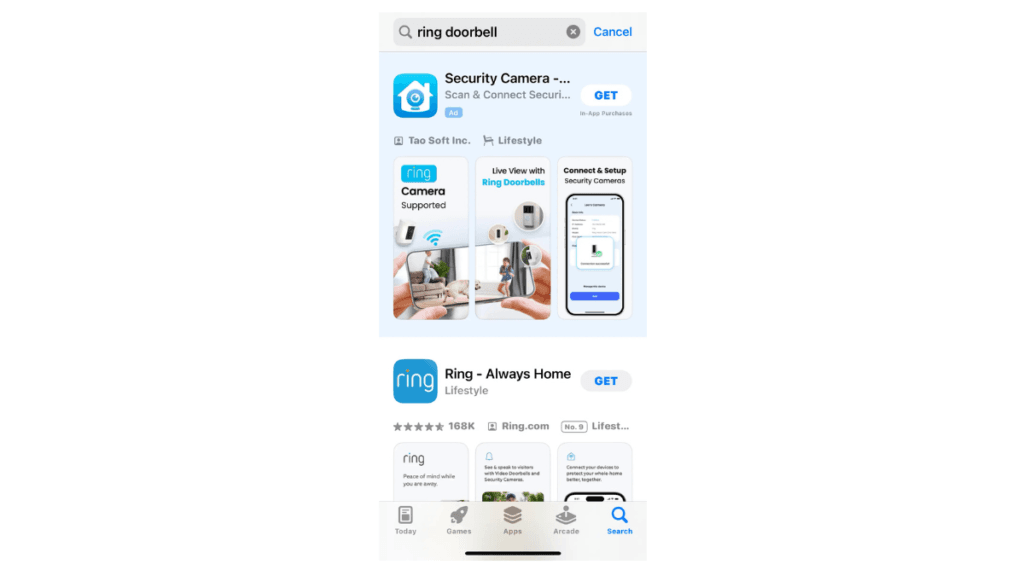
Method A: Using the App Store
- Tap “App Store” on your home screen
- Tap the search icon (magnifying glass, bottom right)
- Type the exact app name from instructions
Example: “Ring – Always Home” - Tap “Search” on keyboard
- Find correct app (check logo matches your device)
- Tap blue “Get” button
- Authenticate with Face ID, Touch ID, or password
- Wait for download (circle fills on app icon)
- Tap “Open” or find app on home screen
Payment Notice on iPhone:
If you see “In-App Purchases” under the app name:
- This means optional extras available inside
- Does NOT mean you have to pay now
- Example: “Free with in-app purchases” = Download free, pay later only if you want extras
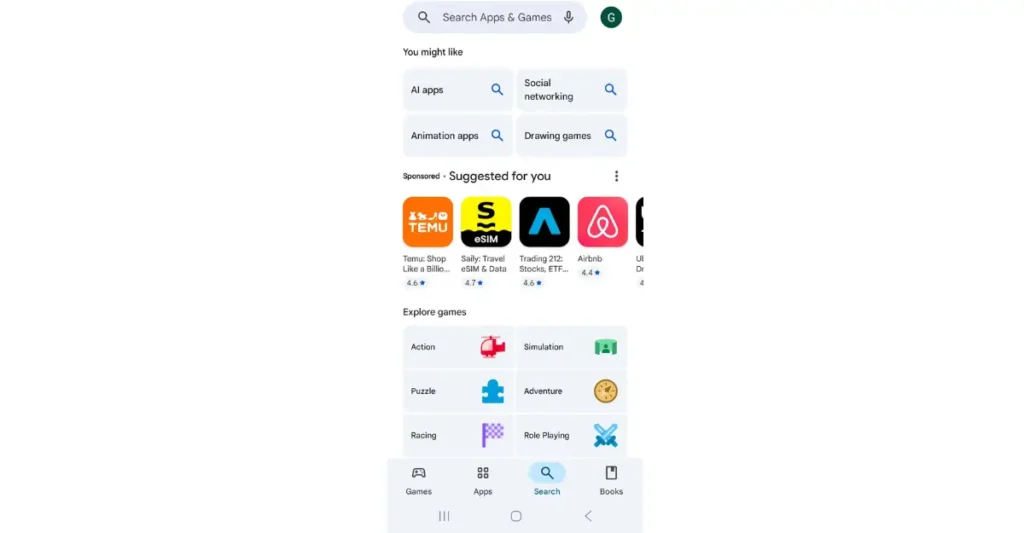
Android Phones (Samsung, Google Pixel, etc.)
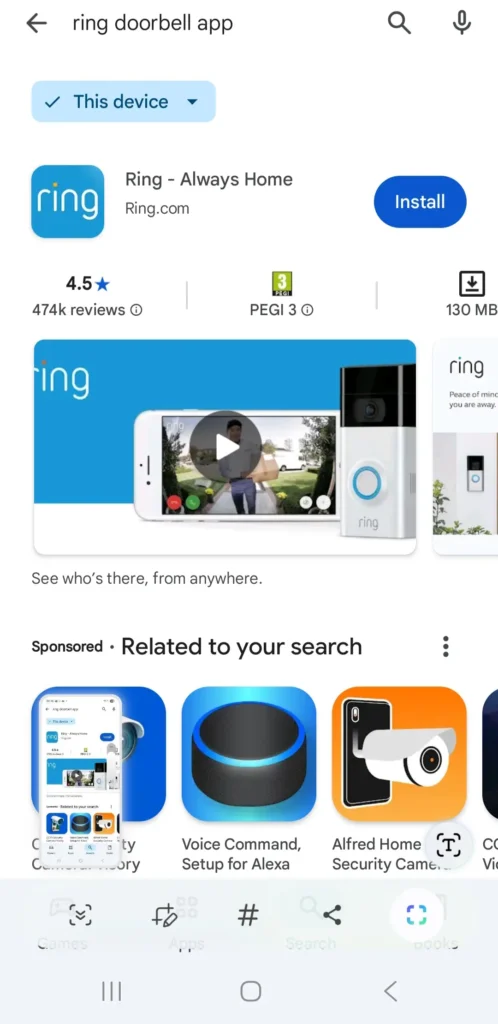
What You’ll See:
- “Google Play Store” (multicoloured triangle)
- Your camera app
- Sometimes “Galaxy Store” on Samsung (use Google Play instead)
Method A: Using Google Play Store
- Tap “Google Play Store”
- Tap search bar at top
- Type exact app name
- Tap search icon on keyboard
- Find correct app
- Tap green “Install” button
- Wait for download (progress bar)
- Tap “Open” or find in app drawer
Android Payment Notice:
Look for these labels:
- “Contains ads” = Free but shows advertisements
- “Offers in-app purchases” = Optional extras available
- “Price” (with £/$ amount) = You pay before downloading
Understanding Subscription Services (The “Extras”)
Real-World Example: Video Doorbells
Most doorbell apps work like this:
- Download app: FREE
- Basic features included FREE:
- See live video when someone rings
- Talk to visitors
- Get motion alerts
- Optional extras (cost money):
- Watch recordings from yesterday/last week
- Store videos for months
- Advanced person detection
This is called a “subscription” – you pay monthly/yearly for the extra features.
Subscription prices are always in pounds (£) when you’re in the UK. If you see prices in dollars ($), you may be looking at the US version of the app, check you’ve selected the UK region in your account settings
How to Know What’s Free vs. Paid:
- Check the app description before downloading
- Look for “Basic features free” or “Subscription required for recording”
- Most apps let you try before buying – install free version first
Real cost examples from UK
- Ring doorbell app: FREE basic use for Live Video, Ring Solo £4.99/month or £49.99/year for Video recording for 1 camera, Ring Multi £7.99/month or £79.99/year for Video recording for all cameras , AI Pro £15.99/month or £159.99/year for enhanced monitoring by Artificial Intelligence !!!
- Fitbit app: FREE tracking, £7.99/month or £79.99/year (cheaper than paying monthly, equivalent to about £6.67/month)for premium insights
- Philips Hue app: FREE (no subscription needed)
Most gadget apps are FREE to download and use basic features. The paid extras are optional, not required.
I recently researched and produced a Blog post about the best Video Doorbells
Important Security Notes
Red Flags to Avoid:
- Never download from email links unless 100% sure
- Check developer name matches company
Good: “Ring LLC”
Bad: “FreeAppDownloads2025” - Look at download counts – legitimate apps have thousands+
- Read recent reviews – check if people mention your device
Permission Pop-Ups Explained:
When app first opens, it might ask:
- “Allow notifications” – Lets app send alerts (usually “Allow”)
- “Allow location” – Needed for weather/security apps
- “Allow camera access” – For scanning codes or using camera
- “Allow Bluetooth” – Required for most smart gadgets
Rule: If permission makes sense for what app does, allow it. If unsure, say “No” – it will ask again if needed.
Managing In-App Purchases (If You Want Extras)
If you decide to buy extras later:
- Open the app you’ve been using
- Look for “Upgrade” or “Premium” or “Subscription”
- Follow app’s instructions – it will guide you
- You’ll need payment method at this point (can add then)
To avoid accidental purchases:
On iPhone:
- Go to Settings → Screen Time → Content & Privacy Restrictions
- Turn on Content & Privacy Restrictions (if not already on)
- Tap “iTunes & App Store Purchases”
- Set “In-app Purchases” to “Don’t Allow”
- Optional: Set “Require Password” to “Always Require”
On Android:
- Open Google Play Store
- Tap profile icon → Settings
- Tap “Authentication”
- Choose “For all purchases” (requires password for every purchase)
Why this matters more for seniors:
- Accidental taps on “Try free trial” can lead to unexpected charges
- Family sharing setups might allow purchases without realizing
- Subscription renewals happen automatically if not cancelled
- Small print about “free trial converting to paid” is easy to miss
Additional iPhone-specific protection:
Consider also enabling “Ask to Buy” if you have Family Sharing:
- Settings → [Your Name] → Family Sharing
- Tap your name (or family member’s)
- Turn on “Ask to Buy”
This adds a second layer of protection, requiring approval for every purchase.
How to use QR codes to install apps:
iPhone:
- 1. Open Camera app
- 2. Point at QR code (square barcode)
- 3. Notification appears at top of screen
- 4. Tap notification → Opens App Store directly
Android:
- 1. Open Camera app (or Google Lens)
- 2. Point at QR code
- 3. Tap banner that appears
- 4. Opens Google Play directly
This is the easiest method** – no typing, no searching, takes you straight to the correct app
Troubleshooting
“It says I need a payment method for free app!”
- Scroll down – look for “None” or “Skip” option
- Close and reopen App Store/Play Store
- Try downloading at different time (sometimes system glitch)
“I only want basic features”
- Download anyway – “In-app purchases” just means options exist
- Ignore upgrade prompts – basic features usually work fine
- Use web version if available (some gadgets have website access)
“How do I know what’s included free?”
- Before downloading: Read app description carefully
- After installing: Explore app completely before considering upgrades
- Manufacturer website: Often lists what’s free vs paid
The Engineer’s Checklist
Before downloading any app, verify:
- Phone charged above 50%? (Downloads use significant power)
- Connected to WiFi? (Avoids mobile data charges, apps can be 100MB+)
- Have Apple ID/Google password? (You’ll need it)
- Enough storage? (Settings → General → Storage – need 500MB free minimum, if phone is very full)
- Device nearby? (Needed for pairing step)
- Payment method decision made? (Skip for now if unsure)
- Instruction manual located? (QR code or app name identified)
All boxes checked? You’re ready to install
Final Advice: Think of It Like Cable TV
Remember cable TV? You got basic channels free, but could pay extra for movie channels. Modern apps work similarly:
Basic package (Free download) = Live viewing, basic controls
Premium package (Optional subscription) = Recordings, advanced features
Start with free version first. Use it for a week. If you find yourself thinking “I wish I could see yesterday’s recording,” then consider the upgrade. Don’t pay for features you might not need.
If you get stuck: Take screenshot of error, reboot/restart your phone, make tea. Return in 10 minutes – most errors fix themselves.
Confused about a specific app’s pricing? Email me the app name at gary@perspectivegadgets.com and I’ll explain exactly what’s free vs paid.
Gary Hall, B.Sc., C.Eng., MICE
Retired Chartered Civil Engineer
Perspective Gadgets – Clear Tech Advice for Real People